
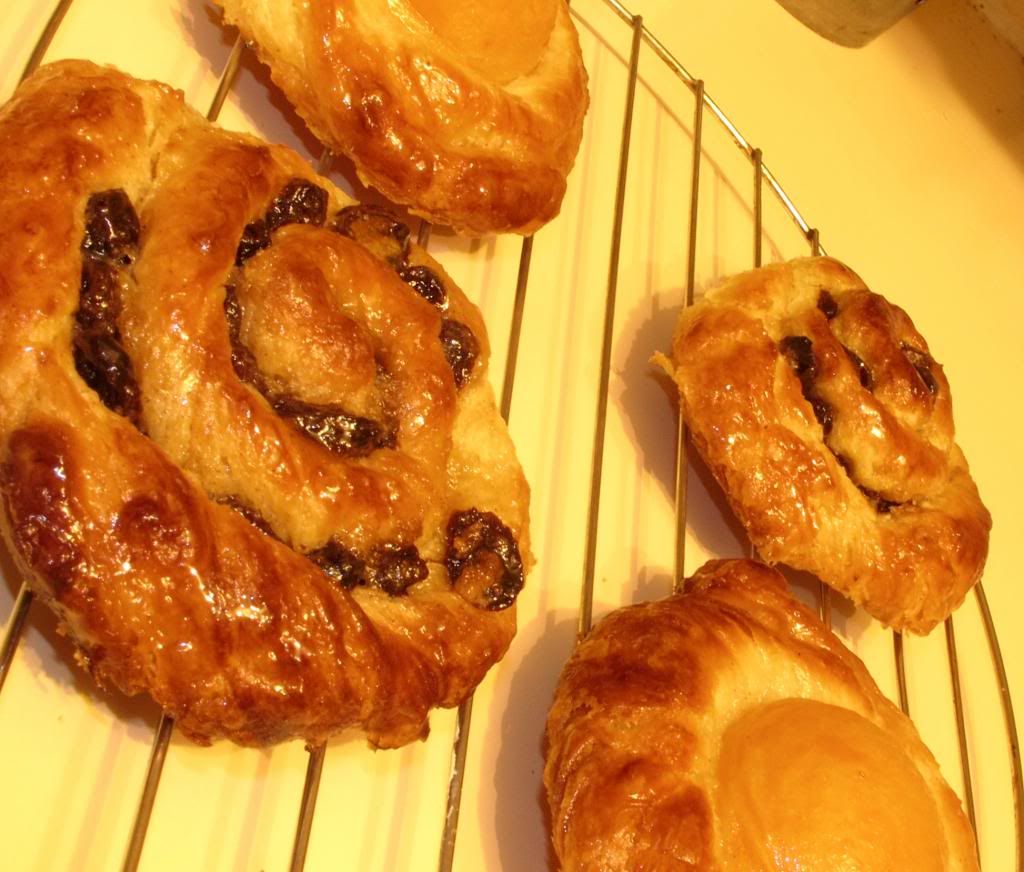
It's been over a month since Matty's birthday. I've been meaning to post about these little beauties since then, but have been more than a little distracted. It's time to unleash their deliciousness on your unsuspecting eyes.
Danish pastry is basically a combo of a delicious yeasty dough and puff pastry. The theory is you mix the dough, roll it out, place butter in the middle, fold over and repeat for a couple of turns. Sounds easy, right? Hahaha! Fools!
This is a delicate operation, but great for a challenge if you have some hours up your sleeve. My tip is to soften your butter enough for it to be easy to work with, but don't make it melty (melty is seriously a word. It's French for galoopy, which is derived from the Latin word sloppy-galoppy). As with other pastries, you need to keep the handling to a minimum to avoid activating the proteins (aka gluten). You also want to keep the beautiful pastry/butter layers distinct, which means no tearing of the pastry - a tough ask when you're on the third fold. Resting time in the fridge is important too: you don't want to harden the butter too much, but you need to let the dough recover from each roll. 20 minutes between rolls is pretty good.
Fillings are a whole other story. Go with your heart on this one. My heart was feeling a little crazy, so it went with three types: apricot halves, raisins and berries. I also used my failsafe for all pastries: creme patisserie (which is actually french for pastry cream. No jokes).
These freeze quite well too - the uncooked dough or even the baked version will hold up well for a couple of months, provided they're wrapped tightly. Not that they'd ever last that long: you'll be sneaking "just a taste" every morning like the danish-junky that you are. I may or may not be speaking about myself here. Just nod and agree.
Ingredients
100ml water
20g fresh yeast
75g flour
40g sugar
10g salt
175ml milk
25ml water
450g flour
300g butter
Mix the first quantity of water and yeast in a bowl along with the 75g of flour. Leave to stand for around 20 minutes. In another bowl, mix the sugar, salt, milk and water. Sift the remaining flour over the yeast mixture and add the liquids. Mix to form a good dough and knead quickly (no more than a couple of minutes). Let it rest for around 40 minutes. Once risen slightly, throw the dough against the bench quickly to remove the air. Let it rest again for an hour.
Now for the butter. You will have softened it so it's easy to work with, right? Roll your dough to a fairly neat rectangular shape around 2cm thick. Spread the butter evenly over 2/3 of the dough, leaving a perimeter of around 2cm around the edges. Fold the nude side over the buttered middle third. Roll the buttered side over that and seal the edges gently. Leave this to rest for 20-30 minutes in the refrigerator.
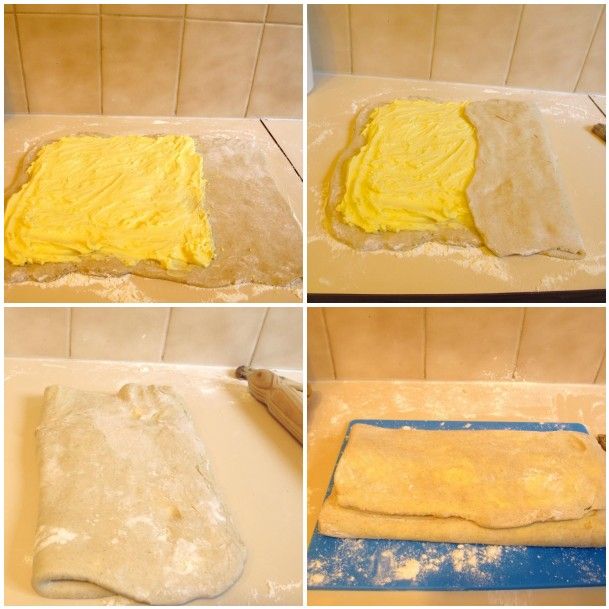
Take out the dough and place with the long seam facing you. Roll to the same size as your first dough. Fold each third into the middle again, and rest for another 20-30 minutes. Repeat twice more.
After your final rest, roll the pastry to around 1cm thick.
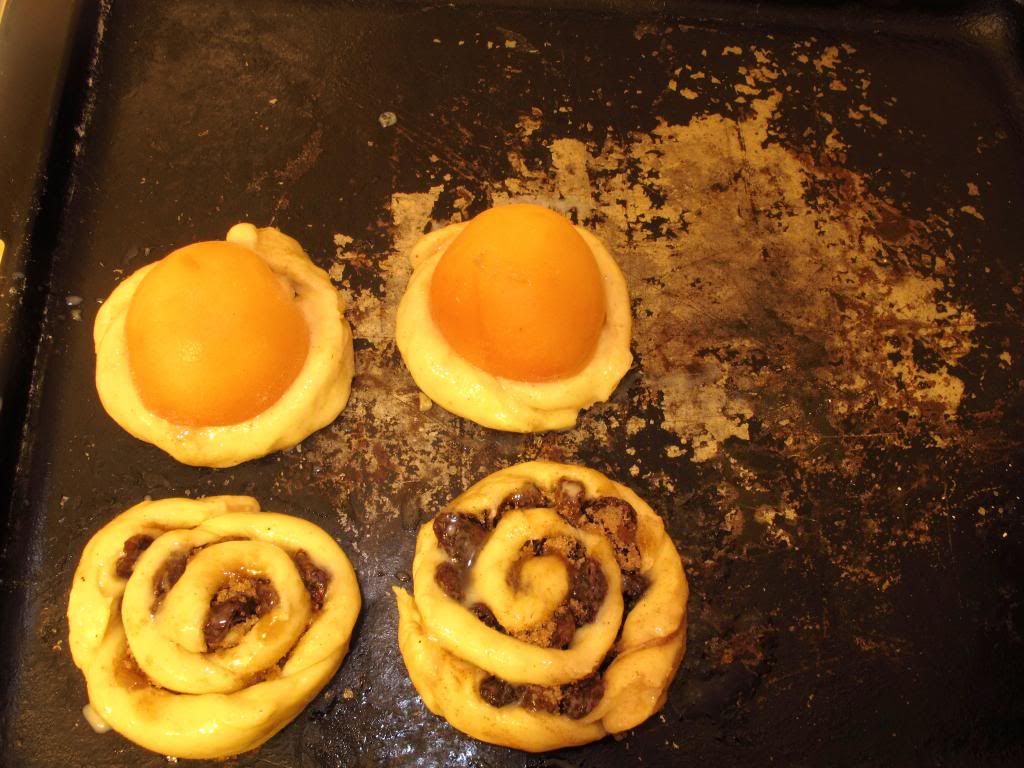
To make apricot danishes, cut into squares with a 2cm edge around the cut half of the apricot. Feel free to add creme patisserie underneath. Fold the exposed pastry edges around the apricot.
To make berry danishes, cut into squares and place berries diagonally along the pastry. Fold the two bare pastry points into the centre.
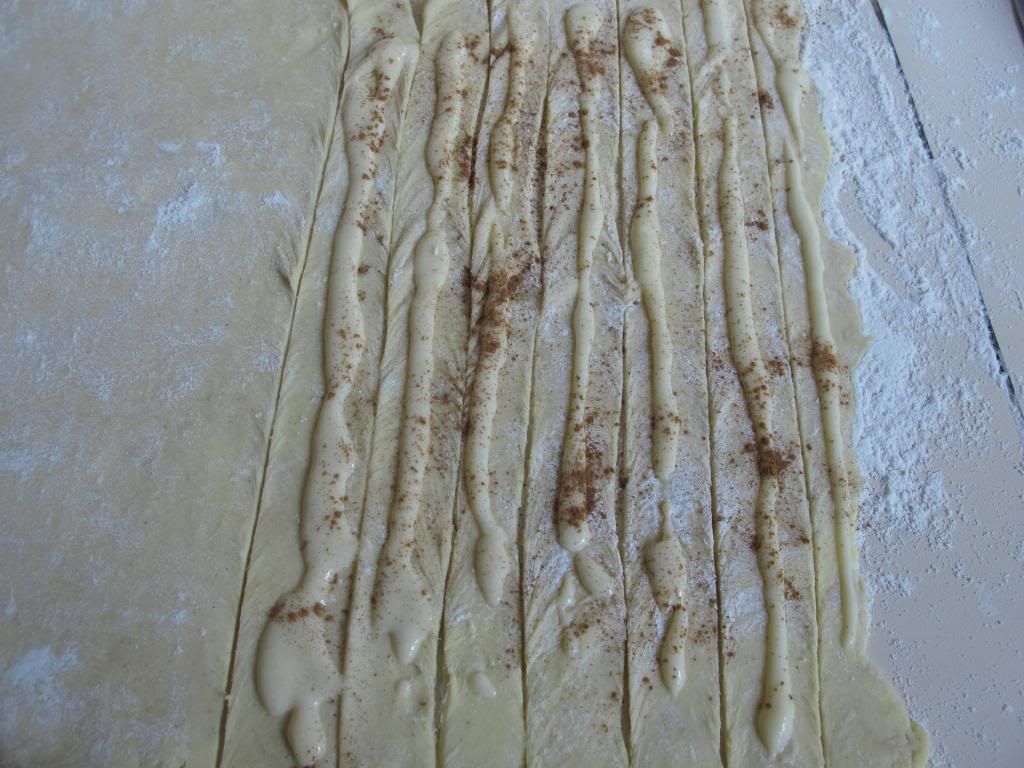
To make raisin danishes, cut lengths around 15cm long. Spread with brown sugar, cinnamon and raisins (again with the creme patisserie). Roll up loosely to form a pinwheel.
To bake, preheat the oven to 200 degrees celsius. Cook for around 20-30 minutes or until golden brown.
To glaze, heat 1/4 cup sugar, 2 tbsp glucose and 2 tbsp water in a saucepan over low heat. Dissolve the sugar and boil for 30 seconds. Brush over the hot pastries fresh out of the oven.
No comments:
Post a Comment